
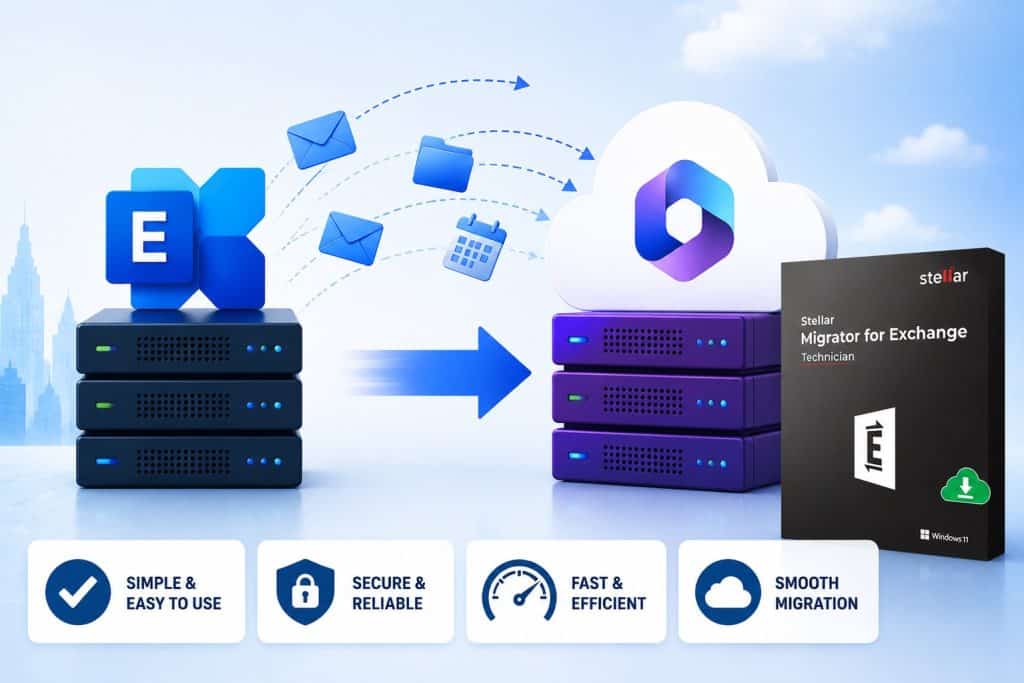

Introduction
Moving an organization’s email infrastructure from an on-premises Microsoft Exchange Server to Microsoft 365 (Office 365) is one of those projects that sounds simple on paper and turns into a nightmare in practice. Between PowerShell scripts, migration endpoints, Hybrid Configuration Wizards, DNS cutovers, and the very real risk of losing calendars, contacts, or entire mailboxes mid-transfer, an Exchange to Office 365 migration is not something most IT teams look forward to.
That’s exactly the gap Stellar Migrator for Exchange is built to fill. It’s a dedicated Exchange migration tool designed to move mailbox data emails, contacts, calendars, tasks, notes, and public folders between Exchange Server and Microsoft 365 without the need for complex scripting or a fragile hybrid setup. In this review, we put it through its paces specifically for the Exchange to Office 365 migration scenario, the most common use case for businesses retiring their on-premises servers in favor of the cloud.
Here’s our honest, hands-on breakdown of what it does well, where it falls short, and whether it’s worth adding to your migration toolkit.
What Is Stellar Migrator for Exchange?
Stellar Migrator for Exchange is a Windows-based migration utility from Stellar Data Recovery, a company with roughly three decades of experience in data recovery and email repair software. Unlike Microsoft’s native migration methods (cutover, staged, or hybrid migration through the Exchange Admin Center), Stellar’s tool provides a GUI-driven, wizard-style workflow that connects directly to source and target servers using IP addresses and admin credentials.
The software supports several migration scenarios beyond Exchange to Office 365, including:
- Exchange Server to Exchange Server (same domain, cross-domain, and cross-forest)
- Office 365 to Office 365 (tenant-to-tenant)
- Office 365 to Exchange Migration
- Exchange to Exchange Server Subscription Edition (SE) upgrades
But for this review, we’re focusing on its core, most-searched-for use case: migrating mailbox data from an on-premises Exchange Server to Office 365.
Step-by-Step: How to Migrate from Exchange to Office 365 Using Stellar Migrator for Exchange
How I Migrated from Exchange Server to Office 365 with Stellar Migrator for Exchange
After testing Stellar Migrator for Exchange for an Exchange to Microsoft 365 migration, I found the workflow straightforward and well organized. The software guides you through the entire process using a wizard, making it suitable for IT administrators handling mailbox migrations. Here’s how the migration process works.
Step 1: Register, Download and Install
You first need to register for the software. Once your registration is complete, you’ll receive the download link along with your Stellar License Server credentials via email. The free trial allows you to migrate up to 2 mailboxes at no cost, with no mailbox size limitation, making it ideal for testing the migration process.
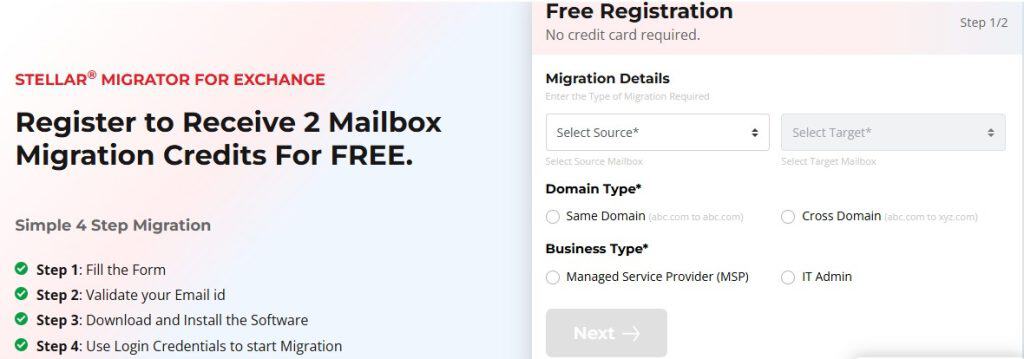
Step 2: Activate the License
Log in to the Stellar Licensing Server using your credentials. Once the connection is verified and the license is detected, you’re ready to create a migration job.
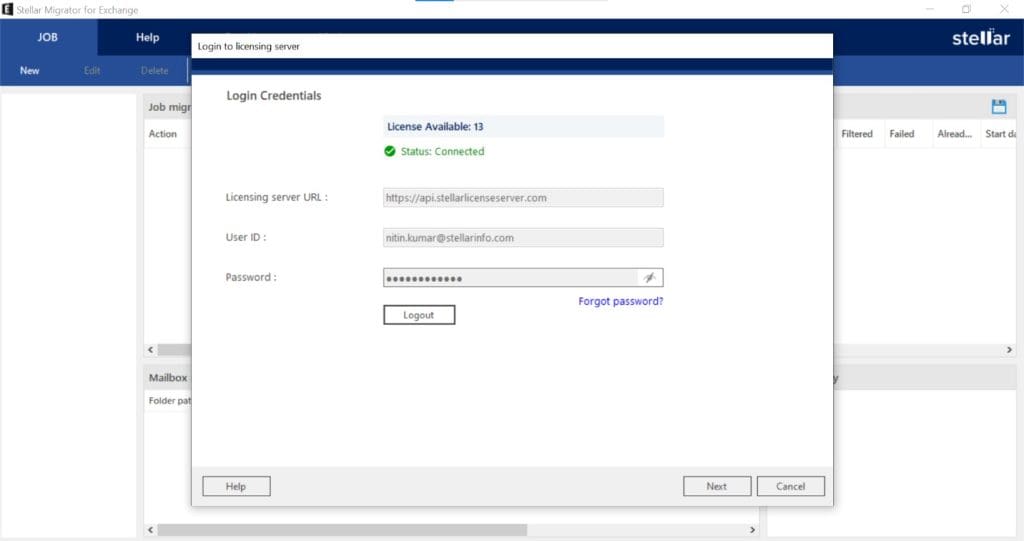
Step 3: Select the Migration Type
Choose Exchange Server as the source and Microsoft 365 as the destination. This configures the software for an Exchange to Office 365 migration.
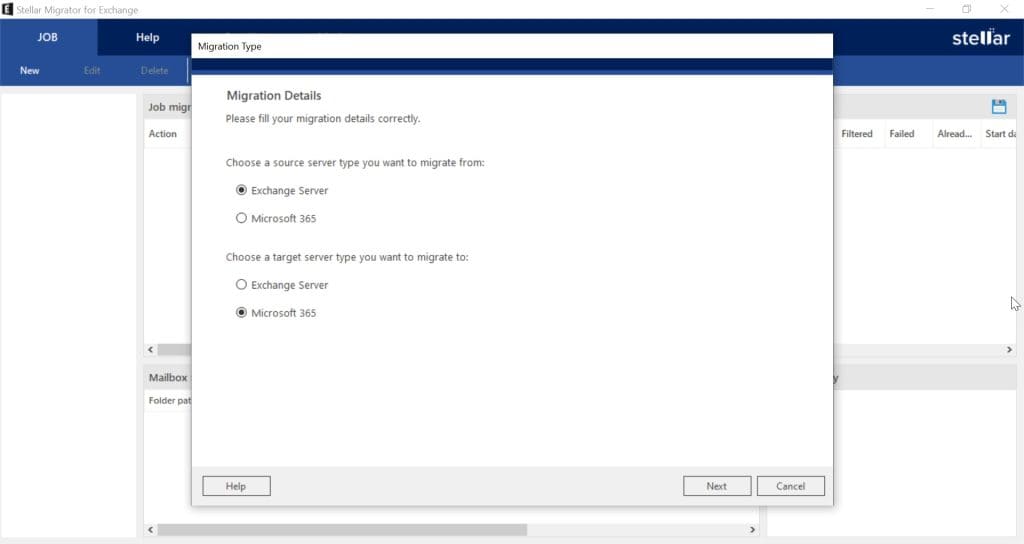
Step 4: Create a Migration Job
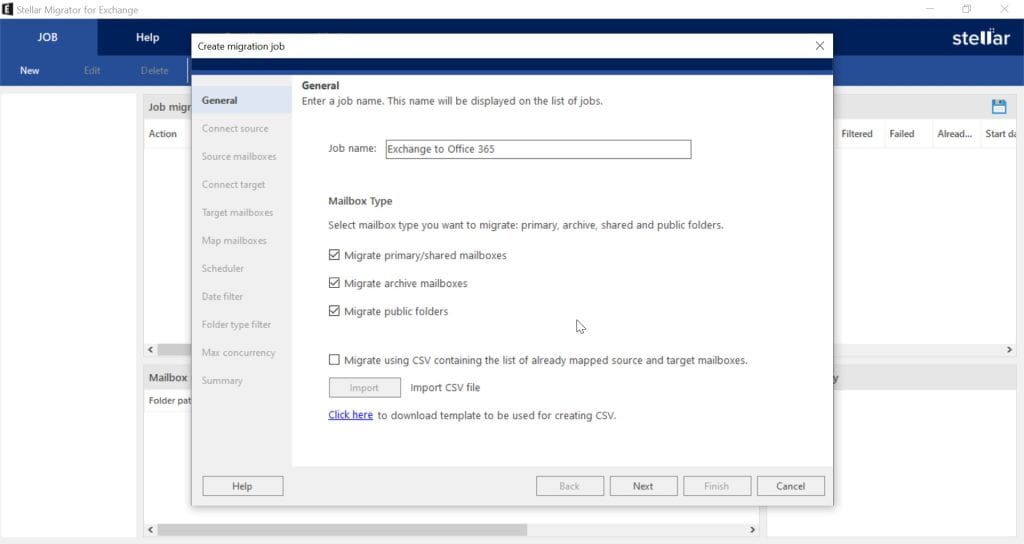
Give the job a name and select the mailbox types you want to migrate, including Primary/Shared Mailboxes, Archive Mailboxes, and Public Folders. You can also import an existing mailbox mapping CSV if required.
Step 5: Connect the Source Exchange Server
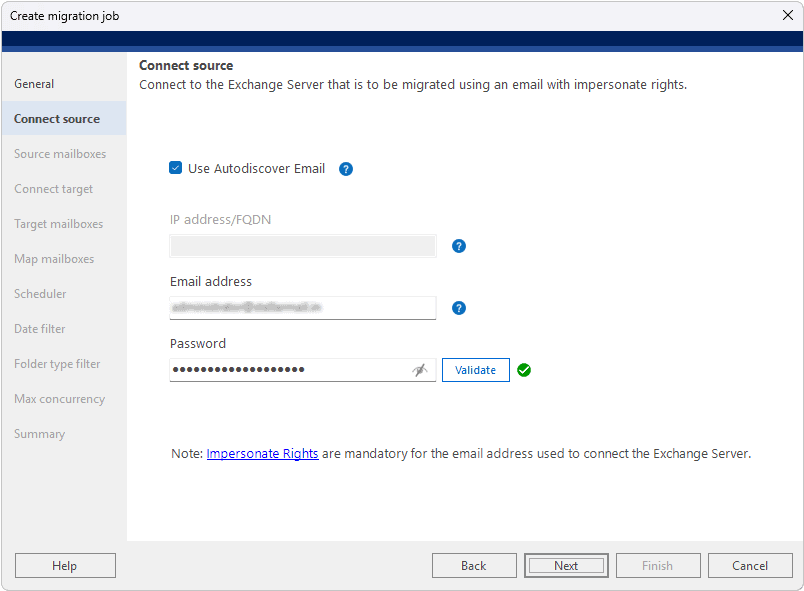
Connect to the Exchange server using Autodiscover or manually enter the server details. Validate the connection before proceeding. Administrative impersonation rights are required.
Step 6: Review Source Mailboxes
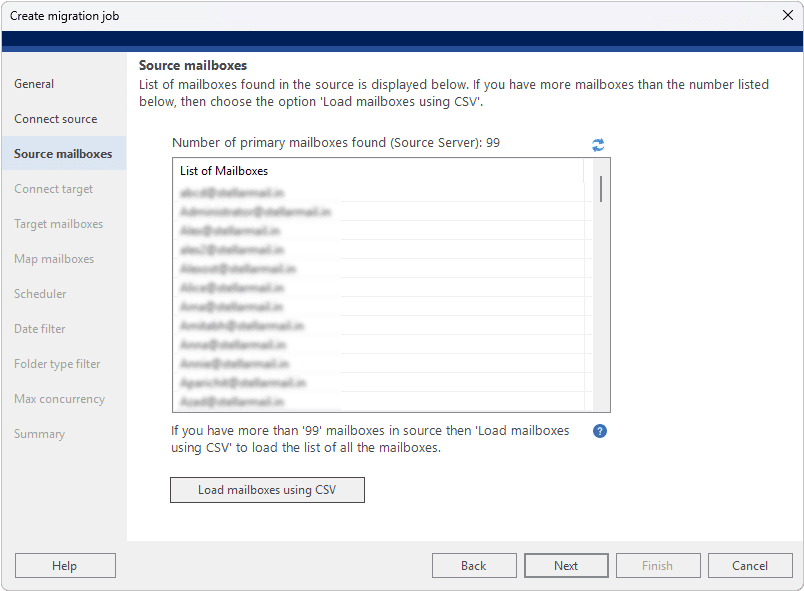
The software displays all discovered mailboxes. Verify the list and, for large environments, import mailbox details through a CSV file.
Step 7: Connect Microsoft 365
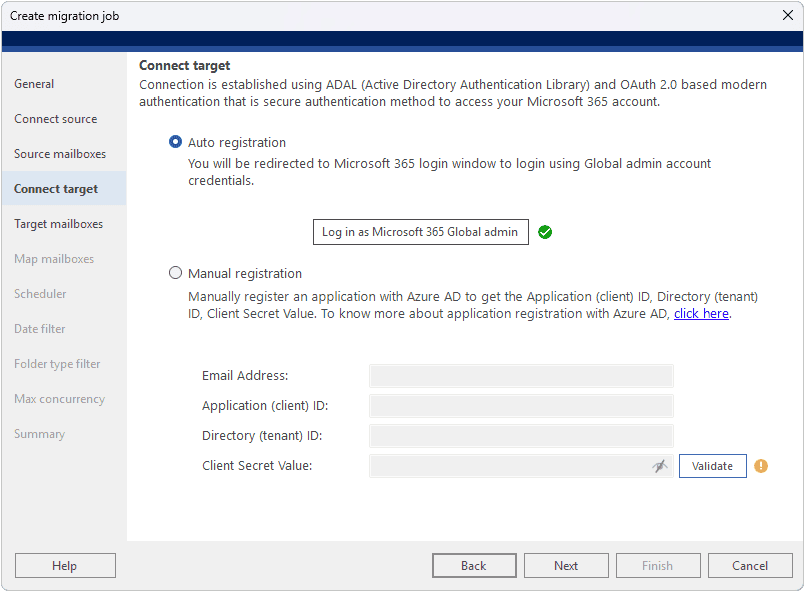
Connect the destination Microsoft 365 tenant using either automatic app registration with Global Admin credentials or manual Azure AD registration. After validation, continue to the next step.
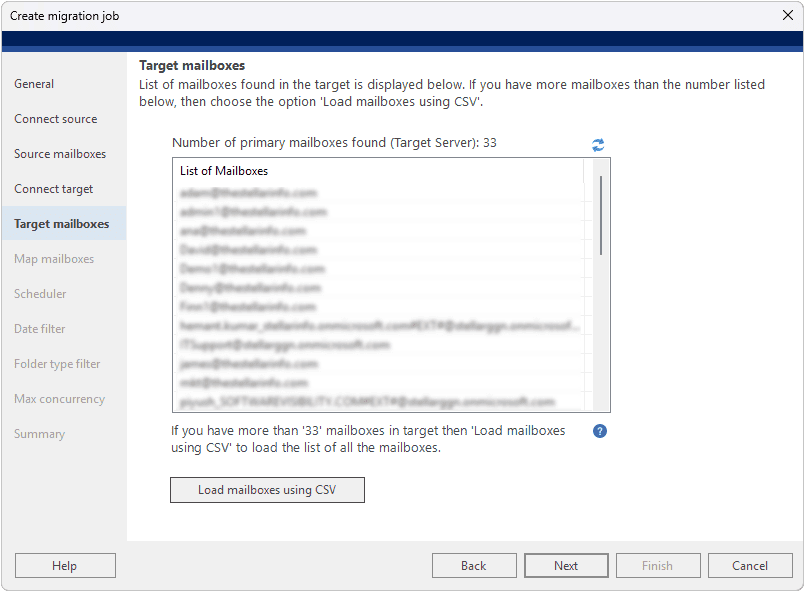
Step 8: Review Target Mailboxes
Verify that all destination mailboxes are available in Microsoft 365. For larger deployments, you can load mailbox information from a CSV file.
Step 9: Map Mailboxes
The software automatically matches source and destination mailboxes based on email addresses. Any unmatched mailboxes are highlighted, allowing you to map them manually before starting the migration.
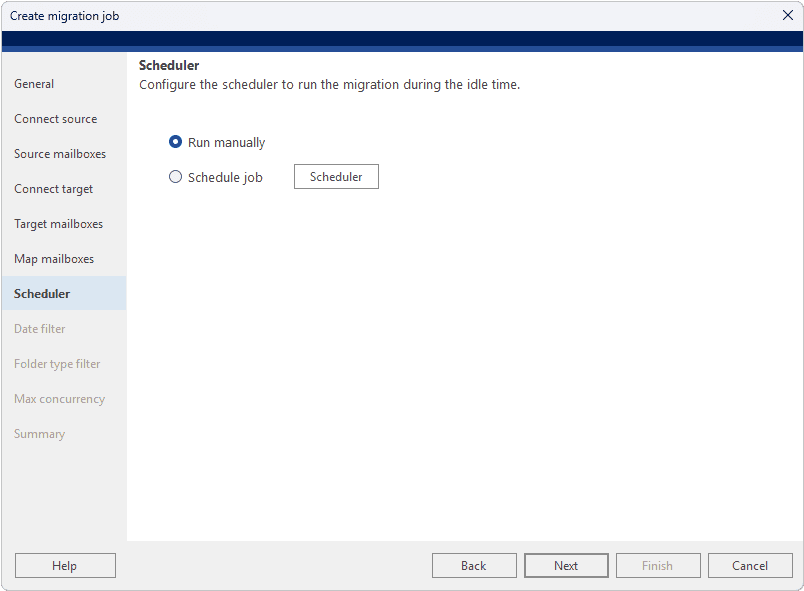
Step 10: Configure the Scheduler
Choose whether to run the migration immediately or schedule it to run once or on a recurring basis (daily, weekly, or monthly).
Step 11: Apply Date Filters
If required, migrate all mailbox items or limit the migration by date to transfer only older, newer, or specific date-range emails.
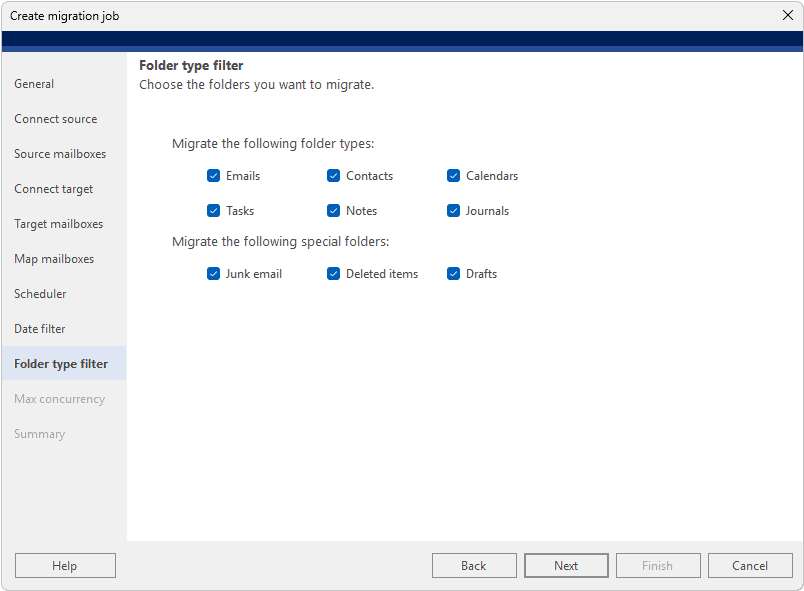
Step 12: Select Folder Types
Choose which mailbox data to migrate. By default, all folder types are selected, including Emails, Contacts, Calendars, Tasks, Notes, Journals, Drafts, Deleted Items, and Junk Email.
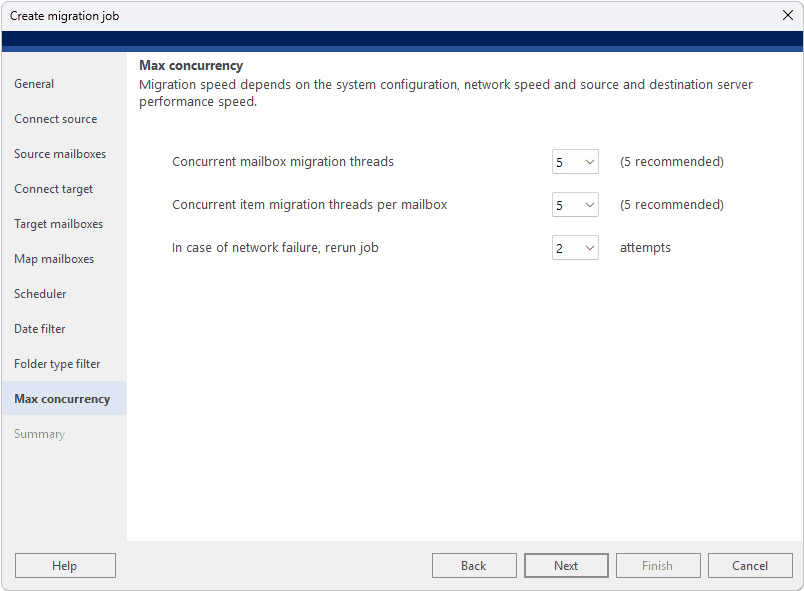
Step 13: Configure Performance Settings
Set the number of concurrent mailbox and item migration threads and define retry attempts for temporary network failures to optimize migration performance.
Step 14: Review the Migration Summary
Before starting, review all configuration settings, including source and destination servers, mailbox mappings, filters, scheduling, and concurrency options. Make changes if necessary, then finalize the job.
Step 15: Start the Migration
Click Start to begin the migration. A live dashboard displays mailbox progress, migrated items, failed items, filtered items, and overall completion status. The migration can be paused or stopped at any time.
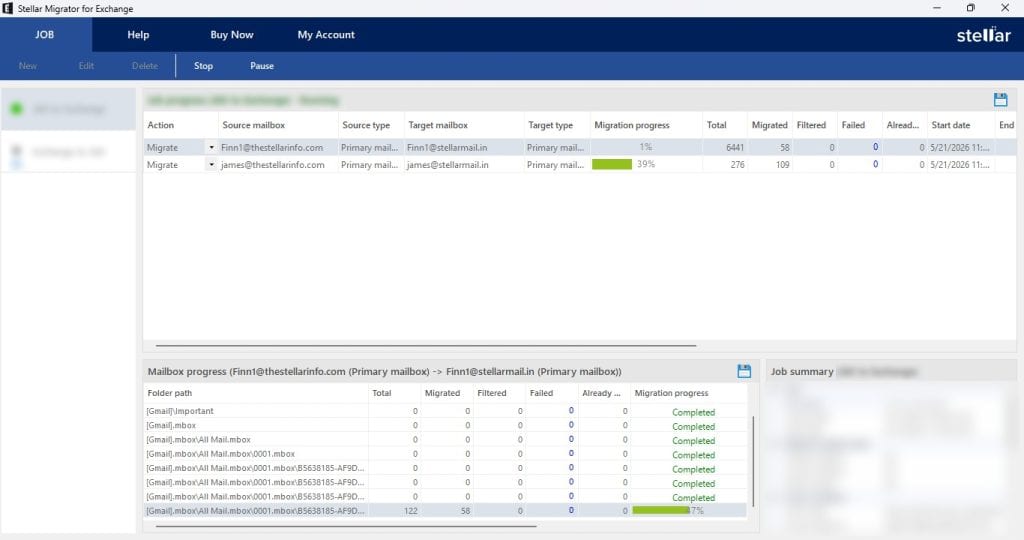
Step 16: Verify Completion
Once complete, successfully migrated mailboxes are marked accordingly. If any mailbox fails, you can rerun the job without repeating the configuration. Since the software supports incremental migration, only new or changed data is migrated, preventing duplicate mailbox content.
Pricing
Stellar offers a free trial that migrates up to 2 mailboxes with no feature limitations, so you can test the full migration workflow before committing.
Paid licensing is based on mailbox count:
- Starts at $250 for smaller mailbox packs (25 mailboxes)
- Scales up through 50, 100, 200, 300, 400 and 500+ mailbox tiers
- Roughly $3 per mailbox for larger volumes, with custom quotes available for bulk purchases
Overall Experience
The migration wizard follows a logical sequence, covering every stage from server connection and mailbox mapping to scheduling, filtering, monitoring, and post-migration verification. Features such as automatic mailbox mapping, CSV support, incremental migration, scheduling, real-time progress tracking, and Microsoft 365 auto-registration make the process much easier than relying on native migration methods, especially for medium and large Exchange environments.
Who Should Use This Exchange Migration Tool?
- IT admins and MSPs managing Exchange-to-Microsoft 365 moves for clients who don’t want to touch PowerShell or maintain a hybrid setup
- Mid-size to large businesses decommissioning aging on-premises Exchange servers (especially those past end-of-life, like Exchange 2010/2013)
- Organizations with large or complex mailboxes including public folders and archives that manual export/import methods struggle to handle cleanly
- Teams that need minimal downtime, thanks to delta/incremental migration support
If your migration is simple a handful of mailboxes, no public folders, no archives Microsoft’s native cutover migration might be “good enough.” But for anything beyond a small, straightforward move, a dedicated Exchange migration tool like this one meaningfully reduces risk and admin hours.
Security and Data Privacy: How Trustworthy Is Stellar Migrator for Exchange?
When you’re moving an entire organization’s mailboxes emails, contacts, calendars, and sensitive attachments security isn’t a nice-to-have, it’s the deciding factor. Stellar addresses this head-on, and it’s worth calling out as its own section since it directly affects whether an IT admin or MSP can actually deploy this in a regulated environment.
Here’s what stood out on the trust and security front:
1. Super Secured (End-to-End Encryption)
2. ISO 9001 & ISO 27001 Certified
3. No Third-Party Software Involved
4. No Storage of Customer Data
5. Secure, Direct Server-to-Server Migration
Why this matters: For businesses in regulated industries healthcare, finance, legal, government contracting the “no data storage” and “no intermediate storage” guarantees are often non-negotiable requirements before any migration tool even makes it onto a shortlist. Combined with the ISO 9001 & ISO 27001 certification and end-to-end encryption, Stellar Migrator for Exchange is positioned less like a convenience utility and more like an enterprise-grade migration platform which is a meaningful differentiator against lighter-weight, PowerShell-script-based alternatives.
Verdict
Stellar Migrator for Exchange does what it promises: it takes a traditionally complex, script-heavy Exchange to Office 365 migration and turns it into a guided, GUI-based process that doesn’t require deep PowerShell expertise or a hybrid environment. The combination of automated mailbox mapping, delta migration, concurrent processing, and public folder support makes it a genuinely useful tool for IT admins who want a predictable, low-downtime migration path to Microsoft 365.
The software solve core problem it solves getting mailbox data from Exchange Server to Office 365 accurately, securely, and with minimal disruption it’s a solid, well-built option that earns a place on any migration shortlist.
Try it yourself: Stellar offers a free trial that lets you migrate 2 mailboxes end-to-end at no cost, which is the best way to judge whether it fits your environment before buying licenses for your full mailbox count.